
Introduction
Dealing with a stripped screw can be a frustrating roadblock, whether you’re assembling furniture, repairing a device, or tackling a home improvement project.
A stripped screw—where the head is damaged and the screwdriver can’t grip it—seems like a small issue but can halt your progress.
Fortunately, there are several easy and effective methods to remove a stripped screw, and with the right tools and techniques, you can get back on track in no time.
This guide explores practical solutions, from household items to specialized tools, to help you remove a stripped screw without stress.
What Is a Stripped Screw?
A stripped screw occurs when the slots or grooves on the screw head are worn down, making it difficult or impossible for a screwdriver to catch and turn it. This can happen due to using the wrong screwdriver size, applying too much force, or working with low-quality screws.
According to a 2023 survey by Home Depot, nearly 60% of DIY enthusiasts encounter stripped screws at least once during home projects, highlighting how common this issue is. Knowing how to remove a stripped screw is a valuable skill for anyone who works with tools.
Why Stripped Screws Are a Problem
Stripped screws can derail your project, damage materials, or require costly repairs if not handled properly. They’re especially tricky in delicate surfaces like wood or drywall, where excessive force can worsen the situation. The good news? With the right approach, you can remove a stripped screw without causing further damage. Let’s dive into the most effective methods to tackle this issue.
Tools You’ll Need to Remove a Stripped Screw
Before attempting to remove a stripped screw, gather the following tools. Most are common household items or easily found at a hardware store:
- Screwdrivers: A set with multiple sizes and types (Phillips, flathead).
- Pliers: Needle-nose or locking pliers for gripping.
- Rubber bands: Wide, thick ones work best.
- Hammer: For tapping or applying light force.
- Drill and drill bits: For creating new slots or extracting screws.
- Screw extractor kit: Designed specifically for stripped screws.
- Lubricants: WD-40, vinegar, or penetrating oil.
- Steel wool or abrasive pad: To improve grip.
- Dremel or rotary tool: For cutting new slots.
- Epoxy or superglue: For advanced methods.
- Safety gear: Gloves and safety glasses for protection.
Having these tools ready will make the process smoother and increase your chances of success.
Easy and Effective Methods to Remove a Stripped Screw
Here are 10 tried-and-true methods to remove a stripped screw, starting with the simplest and progressing to more advanced techniques. Try them in order, as the easiest solutions often work for minor damage.
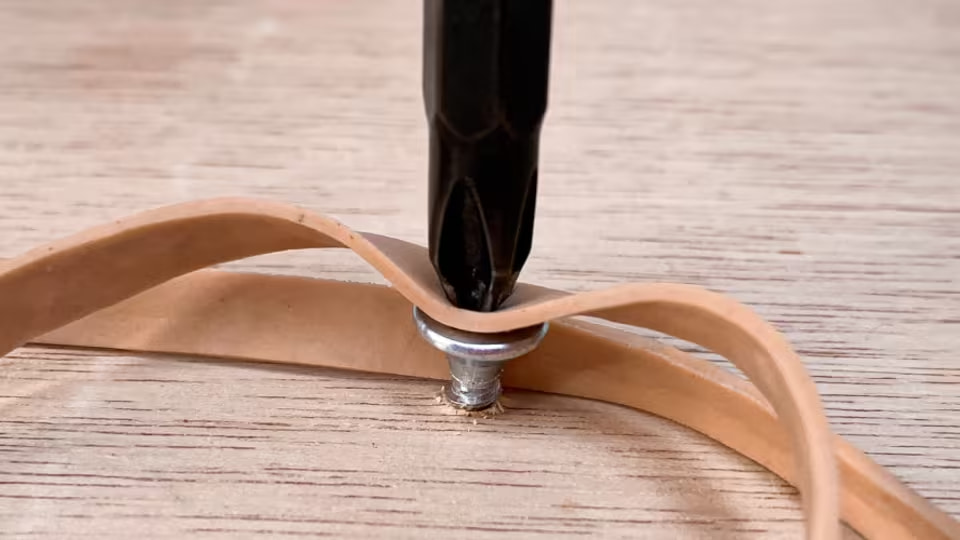
1. Use a Rubber Band for Extra Grip
One of the simplest ways to remove a stripped screw is by using a rubber band to improve your screwdriver’s grip. This method works best for screws with mild stripping.
- How to do it:
- Place a wide rubber band over the stripped screw head.
- Press your screwdriver firmly into the screw head, with the rubber band between the screw and the tool.
- Turn the screwdriver slowly and steadily to loosen the screw.
- Why it works: The rubber band fills the gaps in the stripped head, creating friction for the screwdriver to catch.
- Tip: Use a thick rubber band for better results, and apply steady pressure to avoid further stripping.
2. Switch to a Different Screwdriver
Sometimes, the issue isn’t the screw but the tool. If you’re using a Phillips screwdriver on a slightly stripped screw, try a flathead or a larger/smaller Phillips head.
- How to do it:
- Inspect the screw head to see if another screwdriver type fits better.
- Apply firm, even pressure while turning slowly.
- If the screw starts to turn, continue carefully to avoid further damage.
- Why it works: A different screwdriver size or type can sometimes catch enough of the remaining slots to turn the screw.
- Tip: Ensure the screwdriver fits snugly to maximize grip.
3. Apply Pliers for Surface-Level Screws
If the stripped screw protrudes from the surface, pliers can be a quick fix. Needle-nose or locking pliers work best for this method.
- How to do it:
- Grip the screw head tightly with the pliers.
- Turn the screw counterclockwise to loosen it.
- If it resists, apply a lubricant like WD-40 and wait a few minutes before trying again.
- Why it works: Pliers provide a strong grip, bypassing the need for a screwdriver.
- Tip: This works only for screws that stick out enough to grab.
4. Tap the Screw with a Hammer
For stubborn screws, a light tap with a hammer can help the screwdriver grip better or loosen the screw from its material.
- How to do it:
- Place the screwdriver in the stripped screw head.
- Gently tap the back of the screwdriver with a hammer to lodge it into the screw.
- Try turning the screw while applying downward pressure.
- Why it works: Tapping can create small dents for the screwdriver to grip or loosen the screw’s hold in the material.
- Tip: Use light taps to avoid damaging the screw or surface.
5. Use Steel Wool or an Abrasive Pad
If the screw head is slippery, adding an abrasive material can enhance traction.
- How to do it:
- Place a small piece of steel wool or an abrasive pad over the screw head.
- Press the screwdriver into the screw through the material.
- Turn slowly while maintaining firm pressure.
- Why it works: The abrasive material creates friction, helping the screwdriver catch the stripped head.
- Tip: This method is similar to the rubber band trick but works better for slick or polished screw heads.
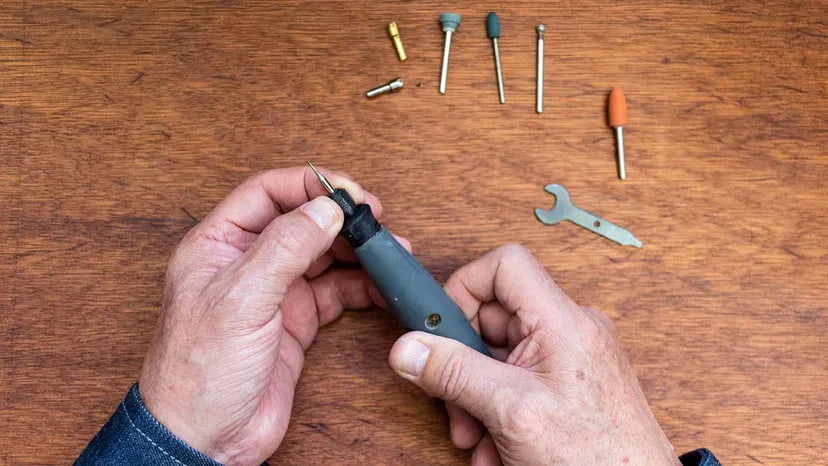
6. Cut a New Slot with a Dremel or Rotary Tool
For more severe cases, cutting a new slot into the screw head allows you to use a flathead screwdriver.
- How to do it:
- Use a Dremel or rotary tool with a cutting wheel to create a straight slot across the screw head.
- Insert a flathead screwdriver into the new slot.
- Turn the screwdriver to remove the screw.
- Why it works: The new slot provides a fresh surface for the screwdriver to grip.
- Tip: Wear safety glasses, as metal shavings can fly during cutting.
7. Apply a Lubricant
Lubricants like WD-40 or household vinegar can loosen a stripped screw stuck in wood or metal.
- How to do it:
- Apply a few drops of lubricant to the screw head and let it sit for 5–10 minutes.
- Try turning the screw with a screwdriver or pliers.
- Repeat if necessary, allowing more soaking time.
- Why it works: Lubricants reduce friction and corrosion, making the screw easier to turn.
- Tip: Wipe away excess lubricant to avoid slipping.
8. Use a Screw Extractor Kit
A screw extractor kit is a specialized tool designed to remove stripped screws. It’s highly effective for deeply stripped or stuck screws.
- How to do it:
- Drill a small pilot hole into the center of the stripped screw using the drill bit provided in the kit.
- Insert the screw extractor into the hole.
- Turn the extractor counterclockwise to remove the screw.
- Why it works: The extractor’s reverse-threaded design grips the screw tightly as you turn.
- Tip: Follow the kit’s instructions carefully to avoid breaking the extractor.
9. Glue a Nut to the Screw Head
For screws that are too damaged for other methods, gluing a nut to the screw head allows you to use a wrench.
- How to do it:
- Apply a strong adhesive, like epoxy or superglue, to the stripped screw head.
- Place a nut over the screw head and let the glue dry completely.
- Use a wrench to turn the nut and remove the screw.
- Why it works: The nut provides a new surface to grip, bypassing the damaged screw head.
- Tip: Ensure the glue is fully cured before turning to avoid slippage.
10. Drill Out the Screw
As a last resort, drilling out the screw removes it entirely but may damage the surrounding material.
- How to do it:
- Select a drill bit slightly larger than the screw’s shaft.
- Drill directly through the center of the screw, destroying it.
- Remove any remaining debris and replace the screw if needed.
- Why it works: Drilling eliminates the screw, allowing you to start fresh.
- Tip: Use this method only when others fail, as it can damage the material.
Tips to Prevent Stripped Screws in the Future
Preventing stripped screws is easier than dealing with them. Here are some practical tips to avoid this issue:
- Use the right screwdriver: Match the screwdriver size and type to the screw head.
- Apply steady pressure: Avoid excessive force, which can wear down the screw head.
- Use high-quality screws: Cheap screws are more likely to strip.
- Pre-drill pilot holes: This reduces resistance when driving screws into wood or metal.
- Use a power drill carefully: Set the clutch to a low setting to avoid over-tightening.
Common Mistakes to Avoid
When trying to remove a stripped screw, avoid these pitfalls:
- Using too much force: This can further damage the screw or material.
- Skipping lubrication: Lubricants can make a big difference in stubborn cases.
- Using the wrong tools: Always match the tool to the screw type and condition.
- Rushing the process: Patience prevents additional damage.
When to Call a Professional
If you’ve tried multiple methods and the screw won’t budge, or if you’re working with delicate materials like electronics or antique furniture, it may be time to call a professional. A handyman or contractor can remove the screw without damaging your project. According to Angie’s List, the average cost for minor repair work, including screw removal, ranges from $50 to $150, depending on the complexity.
Real-Life Example: A DIY Success Story
Take Sarah, a DIY enthusiast who recently shared her experience on a home improvement forum. She was assembling a wooden bookshelf when she encountered a stripped screw in a critical joint. After trying a rubber band and pliers without success, she used a Dremel to cut a new slot. With a flathead screwdriver, she removed the screw in minutes. Sarah’s story shows how persistence and the right method can save a project.
Conclusion
Removing a stripped screw doesn’t have to be a nightmare. With methods ranging from simple rubber band tricks to advanced screw extractor kits, there’s a solution for every situation. Start with the easiest techniques, like using a rubber band or switching screwdrivers, and work your way up to more involved methods if needed.
By staying patient and using the right tools, you can remove a stripped screw and keep your project on track. Next time you face this common DIY challenge, you’ll be ready to tackle it with confidence.


More Stories
35 Witchy Halloween Decor Ideas for a Spooky and Stylish Home Transformation
30 Yellow Living Room 2025 Ideas That Will Brighten Your Home with Warmth, Color, and Style
Transform Your Outdoor Space with Decoradyard: Ideas, Tips, and Inspiration