

Introduction
A warm fire pit brings family and friends together. It becomes the heart of your backyard, where conversations, laughter, and relaxation take place. If you’ve ever dreamed of having your own outdoor fire feature, learning how to build a stone fire pit is both rewarding and surprisingly simple. With the right materials, tools, and a bit of patience, you can create a safe, durable, and stylish fire pit that adds value to your home and enhances your outdoor living experience.
In this comprehensive guide, we’ll walk through every detail — from planning and safety considerations to gathering materials and constructing your fire pit. By the end, you’ll have the knowledge and confidence to build one yourself.
Why Build a Stone Fire Pit?
Before jumping into the process, let’s understand why stone fire pits are so popular.
- Durability – Stone is naturally strong and resistant to heat, weather, and time.
- Aesthetic Appeal – A stone fire pit blends seamlessly with almost any outdoor setting, from rustic cabins to modern patios.
- Cost-Effective – Building your own is far cheaper than hiring contractors or buying pre-made units.
- Customizable – You can choose the size, shape, and design that fits your backyard.
- Value Addition – A well-built fire pit increases the beauty and resale value of your home.
In fact, according to the American Society of Landscape Architects, fire pits are one of the most requested outdoor design features, with nearly 67% of homeowners preferring them in their landscaping projects.
Step 1: Planning Your Stone Fire Pit

Every successful project begins with planning.
Choose a Safe Location
- Pick a flat, open space away from overhanging trees, fences, or sheds.
- Maintain at least 10–15 feet of distance from your home or other structures.
- Avoid areas with underground utility lines — call your local utility company before digging.
Decide on the Shape and Size
- Round fire pits are classic and easier to build.
- Square or rectangular designs give a modern touch.
- A good standard size is 3–4 feet in diameter and about 12–18 inches high.
Check Local Regulations
Some towns have fire codes or restrictions on open flames. Always check with your local fire department before starting.
Step 2: Gathering Tools and Materials

You don’t need professional equipment, just basic tools and supplies:
Tools
- Shovel
- Level
- Tape measure
- Rubber mallet
- Tamper (for compacting soil)
- Masonry adhesive or mortar (optional)
- Safety gloves and goggles
Materials
- Fire pit stones (retaining wall blocks or natural stones)
- Gravel (for drainage)
- Sand (to level the base)
- Fire ring insert (optional but recommended for safety and durability)
Tip: If you’re using natural stones, select flat, uniform pieces for easier stacking.
Step 3: Preparing the Base

- Mark the Area
- Use spray paint or lay a rope in a circle to outline your fire pit.
- Dig the Base
- Excavate about 6–8 inches deep within the marked area.
- Add Gravel
- Pour 3–4 inches of gravel into the hole for drainage.
- Compact the Base
- Use a tamper to flatten and stabilize the surface.
- Add Sand Layer
- Spread 1–2 inches of sand on top for leveling.
- Spread 1–2 inches of sand on top for leveling.
This foundation ensures your fire pit remains stable and prevents shifting over time.
Step 4: Laying the First Layer of Stones
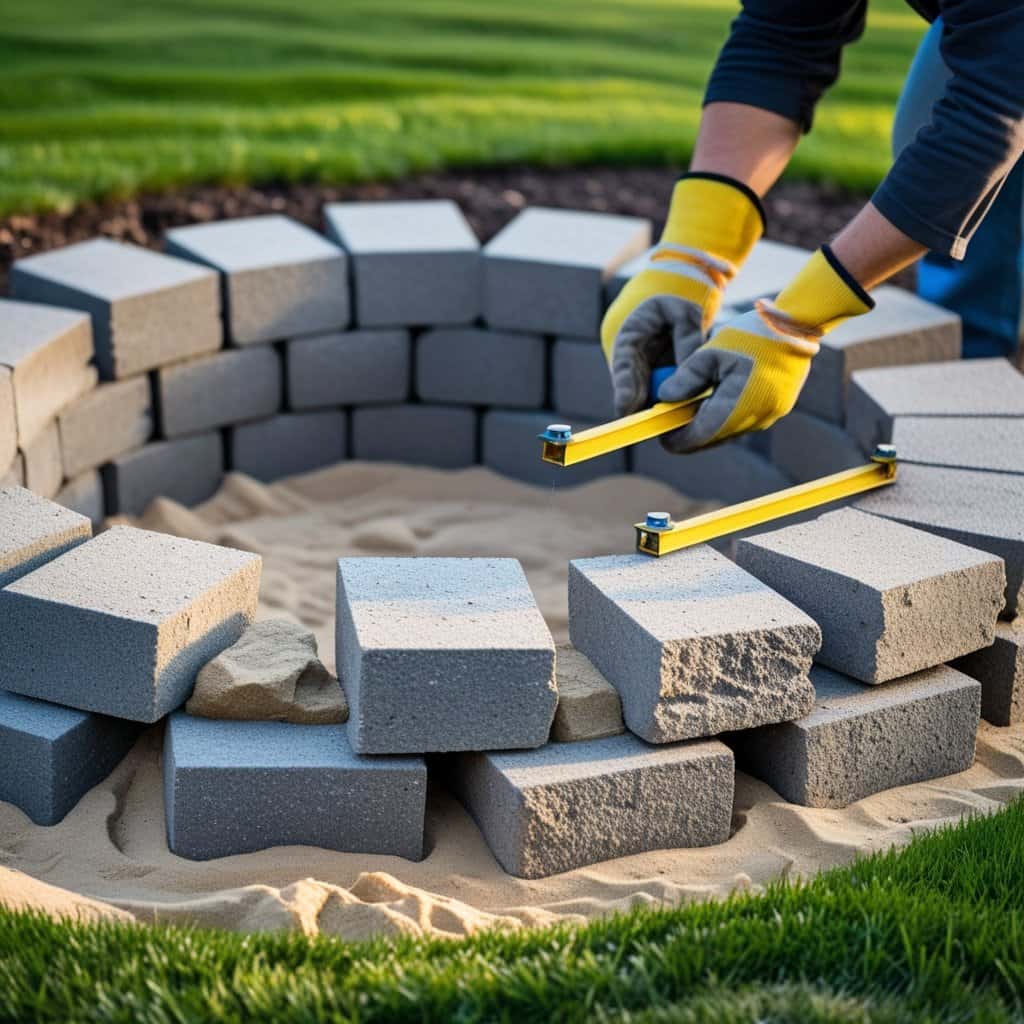
- Place the first row of stones in a circle or square, depending on your design.
- Use a level to make sure the stones are even.
- Adjust with sand beneath any uneven stones.
Pro Tip: The first row is the most important. If it’s level, the rest of the fire pit will be stable and balanced.
Step 5: Building Up the Walls
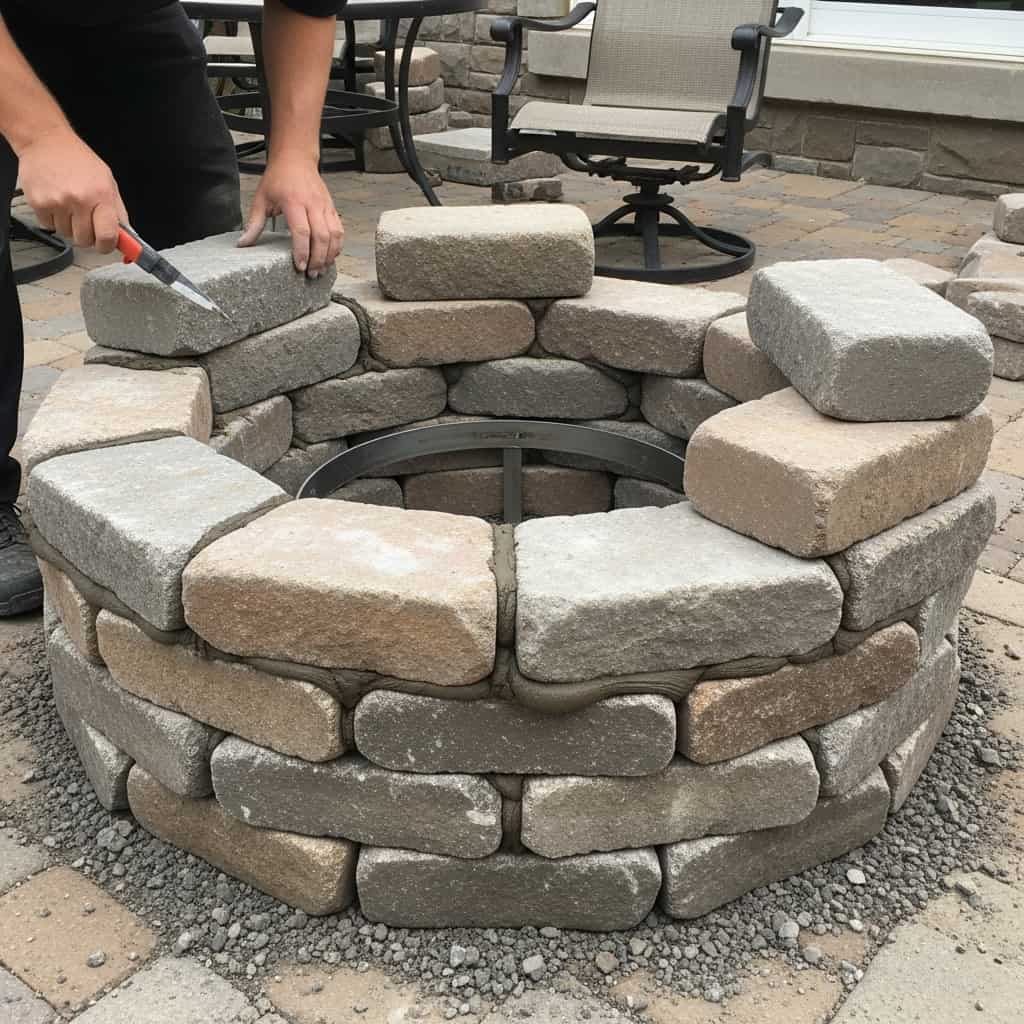
- Stack stones in a staggered pattern (like bricks) to add strength.
- Apply masonry adhesive or mortar between layers for extra stability (optional but useful).
- Continue stacking until the fire pit reaches the desired height (usually 3–4 rows).
Adding a Fire Ring (Optional)
Installing a steel fire ring insert inside the stone walls protects the stones from direct heat and extends the life of your fire pit. It also provides a cleaner, more professional finish.
Step 6: Finishing Touches
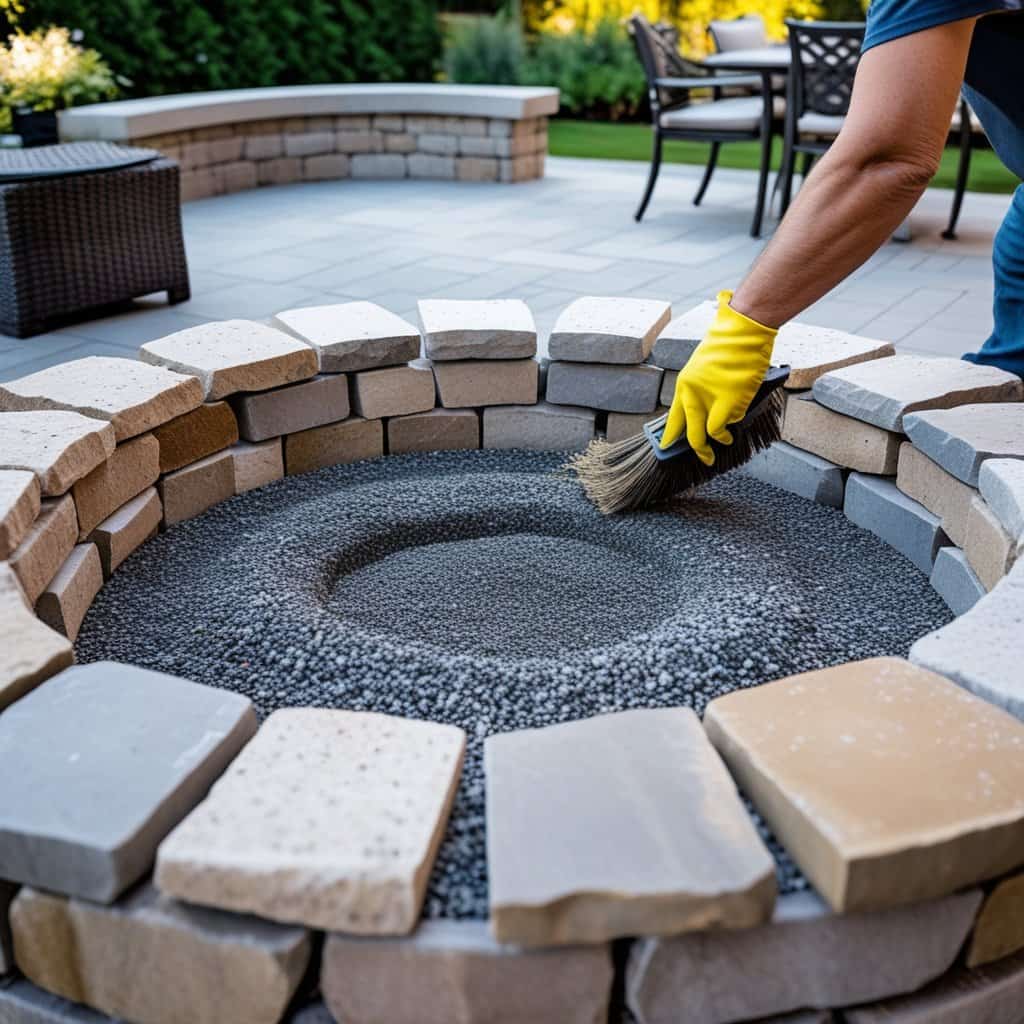
- Fill any gaps between stones with smaller rocks or sand.
- Ensure the top layer is even and secure.
- Pour a thin layer of gravel inside the fire pit for better drainage and a clean surface.
At this stage, your fire pit is structurally complete. All that’s left is to enjoy it.
Step 7: Testing and Safety Precautions
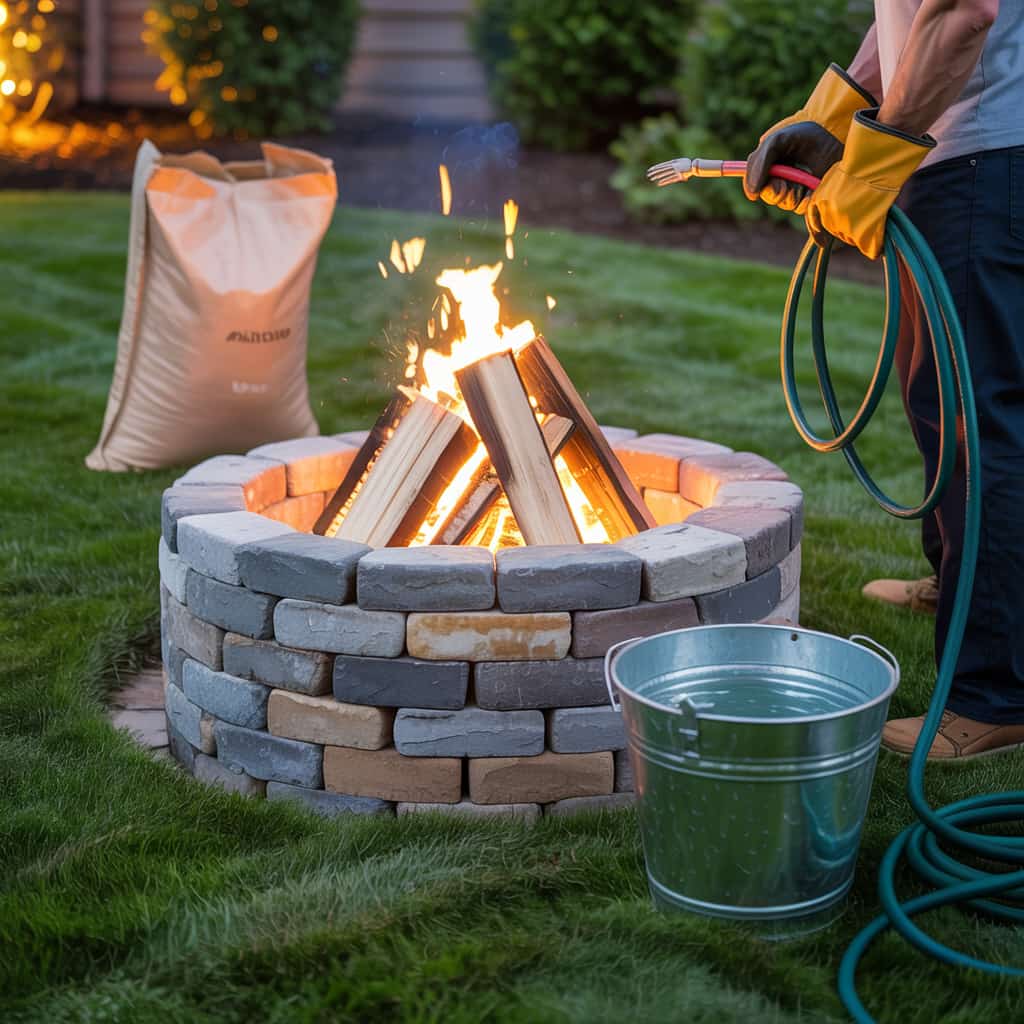
Before your first fire:
- Let any mortar or adhesive cure for 24–48 hours.
- Start with a small fire to test airflow and stability.
- Keep a bucket of water, hose, or sand nearby.
- Never use gasoline or lighter fluid — instead, use dry wood or fire starters.
Fire Safety Tips
- Never leave a fire unattended.
- Avoid burning trash or plastics.
- Supervise children and pets around the fire pit.
- Extinguish completely before leaving.
Creative Design Ideas for Stone Fire Pits
Building your fire pit doesn’t mean you’re limited to simple circles. Here are a few design ideas:
- Sunken Fire Pit – Dig deeper so the fire pit sits partly below ground.
- Patio Integration – Build the fire pit into a paved patio for a seamless look.
- Double-Wall Design – Create two layers of stone with space between for airflow.
- Cooking Feature – Add a metal grate for grilling.
- Built-in Seating – Surround your fire pit with stone benches or curved walls.
Cost of Building a Stone Fire Pit
The cost varies based on size, materials, and whether you use a fire ring. On average:
- DIY stone fire pit: $300–$600
- Professional installation: $900–$3,000+
Doing it yourself not only saves money but also gives you the pride of creating something lasting with your own hands.
Common Mistakes to Avoid
- Skipping the base preparation – Without gravel and sand, stones can shift.
- Building too close to the house – Creates serious fire hazards.
- Using the wrong stones – Some rocks (like river rocks) can explode under heat. Always use fire-rated stones or bricks.
- Making it too tall – Keep the height manageable so heat radiates outward instead of upward.
Benefits of a Backyard Fire Pit
Having a fire pit does more than just provide warmth.
- Extends your outdoor season into cooler months.
- Creates a natural gathering space for family and guests.
- Enhances outdoor dining and entertaining.
- Adds charm and character to your backyard.
- Boosts property value.
In fact, a study by Realtor.com showed that homes with outdoor fire features can sell for up to 2.8% more than similar homes without them.
Seasonal Maintenance Tips
To keep your fire pit in top shape:
- Spring – Clear out debris and check for loose stones.
- Summer – Use a fire pit cover when not in use.
- Fall – Clean ashes regularly to avoid buildup.
- Winter – Avoid lighting fires if the stones are wet and temperatures are below freezing (to prevent cracking).
Conclusion
Building your own stone fire pit is a project that combines creativity, practicality, and craftsmanship. It’s an investment in your home and lifestyle, offering countless evenings of warmth, comfort, and joy.
Now that you know how to build a stone fire pit, you can turn your backyard into a welcoming retreat for family and friends. With proper planning, quality materials, and safety in mind, your DIY fire pit will last for years — becoming a centerpiece of gatherings and memories.
So grab your shovel, gather your stones, and start building the fire pit of your dreams today.


More Stories
How To Style A Coffee Table For Every Home
How to Decorate Your Home for Christmas Like a Pro
15 Easy Steps to Build a DIY Pergola: A Complete Homeowner’s Guide