


Introduction
Wiring a light switch may seem like a daunting task, but with the right guidance, it becomes a simple DIY project. Whether you’re replacing an old switch or installing a new one, this guide will walk you through the entire process in an easy-to-understand manner.
Why is learning how to wire a light switch important?

Understanding how to wire a light switch can save you money on electrician fees and help you handle minor electrical repairs safely. It also enhances your knowledge of home electrical systems, ensuring safety and efficiency.
Tools and Materials You Will Need
Before starting, gather the following tools and materials:
- Screwdriver (flathead and Phillips)
- Wire stripper
- Voltage tester
- Electrical tape
- Needle-nose pliers
- New light switch
- Electrical box (if installing a new switch)
- Wire connectors (wire nuts)
- Circuit tester
Safety First: Precautions Before Wiring a Light Switch
Electrical work can be dangerous if not done correctly. Follow these safety precautions:
- Turn Off the Power – Locate your home’s electrical panel and switch off the breaker supplying power to the switch you are working on.
- Use a Voltage Tester – Before touching any wires, use a voltage tester to confirm that no electricity is running through them.
- Follow Proper Wiring Guidelines – Always adhere to local electrical codes and guidelines to ensure a safe installation.
Understanding Light Switch Wiring Basics
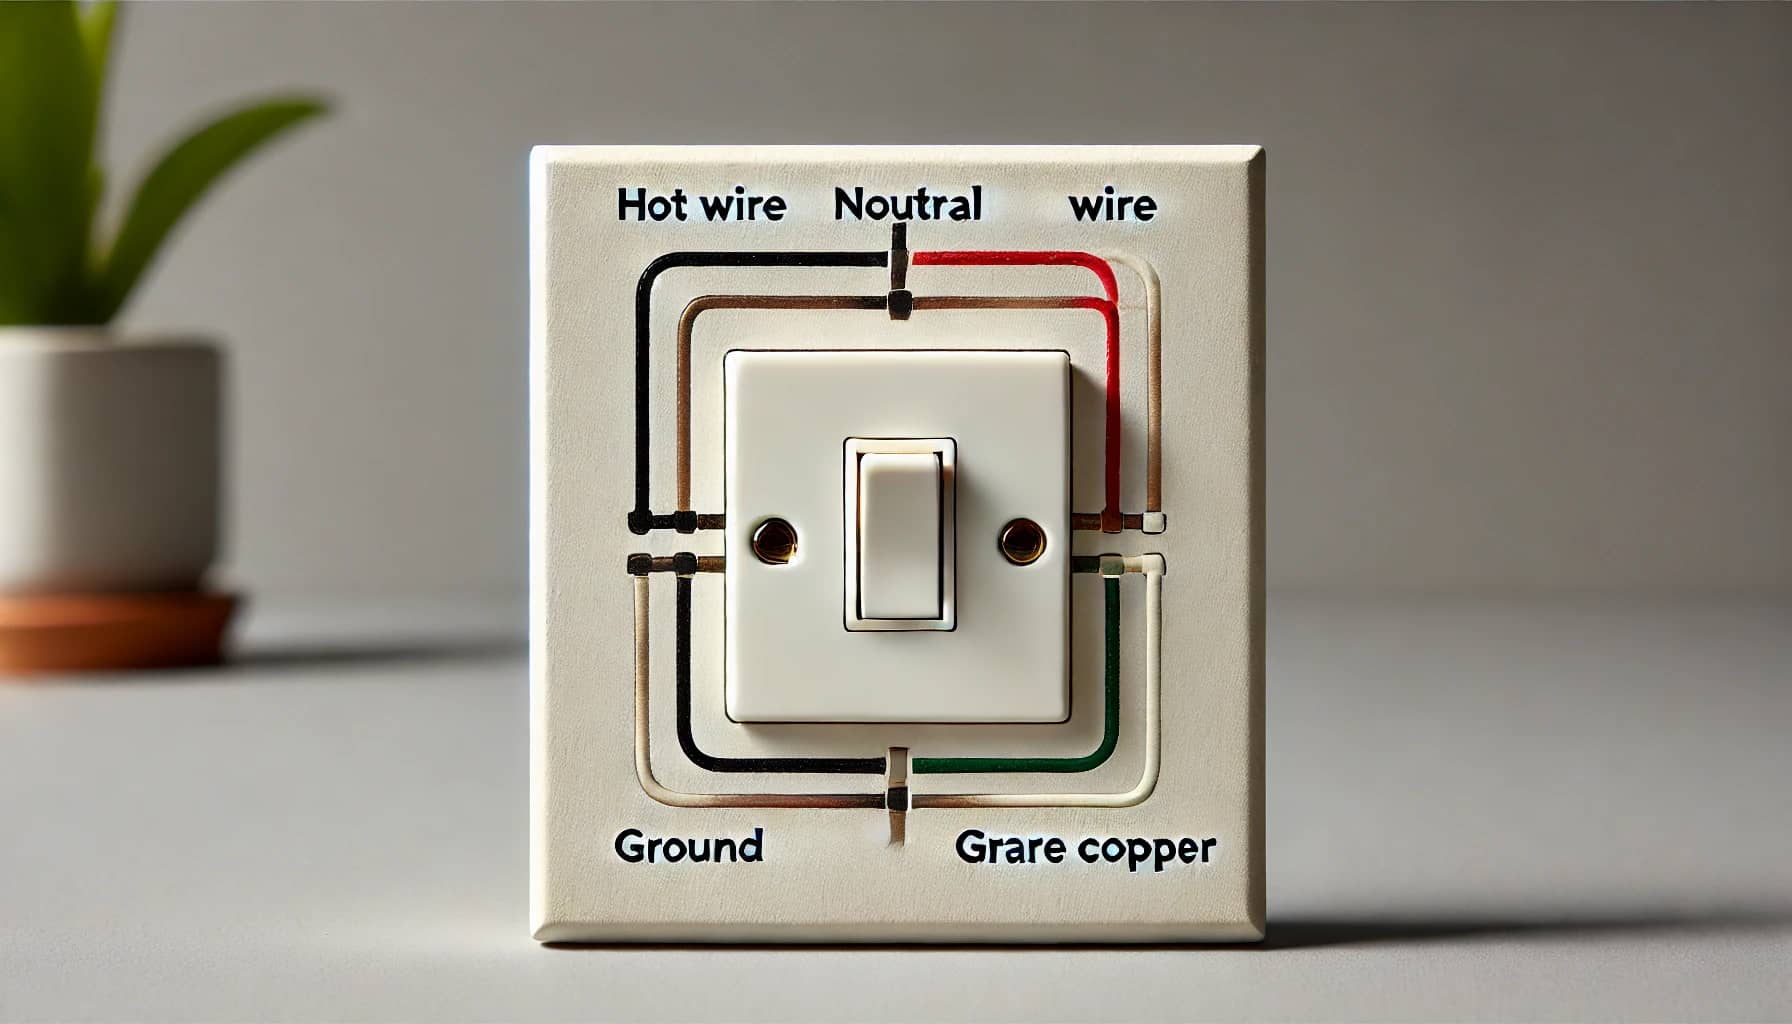
A standard light switch has three main wires:
- Hot Wire (Black or Red): Carries electricity from the power source.
- Neutral Wire (White): Completes the circuit by returning power to the panel.
- Ground Wire (Green or Bare Copper): Prevents electrical hazards by grounding excess electricity.
Step-by-Step Guide on How to Wire a Light Switch
Step 1: Turn Off Power and Remove Old Switch
- Go to your circuit breaker box and turn off the power.
- Use a screwdriver to remove the cover plate and the screws holding the switch in place.
- Carefully pull the switch out of the electrical box.
- Use a voltage tester to confirm no power is flowing.
- Take note of how the existing wires are connected to the switch before disconnecting them.
Step 2: Prepare the Wires
- Use a wire stripper to remove about ½ inch of insulation from the ends of each wire.
- Ensure the wires are in good condition and not frayed or damaged.
Step 3: Connect the New Light Switch
- Attach the Ground Wire:
- Connect the bare copper or green ground wire to the green screw on the switch.
- Secure it by tightening the screw.
- Connect the Hot Wire:
- Attach the black or red wire to the brass screw (this is the “hot” terminal).
- Tighten the screw securely.
- Connect the Neutral Wire:
- If your switch has a neutral wire, connect it to the silver screw on the switch.
- Some light switches, like single-pole switches, may not require a neutral wire.
Step 4: Secure the Switch and Restore Power
- Carefully push the wires back into the electrical box.
- Secure the switch with screws and attach the cover plate.
- Restore power by turning the breaker back on.
- Test the switch to ensure it is working properly.
Types of Light Switches You Can Install

There are different types of light switches, each serving a unique purpose:
- Single-Pole Switch: Controls one light fixture from a single location.
- Three-Way Switch: Allows control of one light fixture from two different locations.
- Dimmer Switch: Adjusts the brightness of a light.
- Smart Switch: Can be controlled remotely via Wi-Fi or Bluetooth.
Troubleshooting Common Light Switch Wiring Issues
If your light switch isn’t working correctly, check for these common problems:
- Loose Connections – Ensure all wires are securely attached to the switch terminals.
- Wrong Wire Connections – Double-check that the wires are connected to the correct terminals.
- Faulty Switch – If the switch is old or defective, replacing it may solve the issue.
- Tripped Breaker – Verify that the circuit breaker hasn’t tripped.
FAQ’s
1. Can I wire a light switch without turning off the power?
No. It is extremely dangerous to work on electrical components without turning off the power. Always switch off the breaker before starting.
2. Do I need an electrician to install a light switch?
For simple replacements, a DIY approach is safe. However, if you’re unsure or installing a complex switch, it’s best to hire a professional.
3. How do I know if my light switch needs replacing?
Signs that your light switch needs replacement include flickering lights, a warm switch plate, or a switch that doesn’t turn on/off properly.
4. Can I install a smart switch using the same wiring process?
Yes, but some smart switches require a neutral wire. Check the installation manual before proceeding.
5. What happens if I don’t connect the ground wire?
The ground wire is crucial for safety. Not connecting it increases the risk of electrical shocks and fire hazards.
Conclusion
Wiring a light switch is a valuable skill that can enhance your DIY abilities and save money. By following the steps outlined in this guide, you can successfully and safely wire a light switch in your home. Always prioritize safety, use the right tools, and double-check your connections before restoring power.
Now that you know how to wire a light switch, why not try upgrading to a dimmer or smart switch for added convenience? Let us know in the comments if you have any questions or need further guidance!